Showing posts with label DIY. Show all posts

Thursday, March 5, 2015

Tips and Tricks for Sewing Tiny Doll Clothes


I don't know about you guys, but sewing doll clothes has (until recently!) always been mysteriously frustrating for me. I just couldn't figure out how other people were doing it so successfully. My sewing machine would invariably gobble up those tiny seam allowances, leaving me cursing violently understandably frustrated while trying to yank my dress back out of the stitch plate. Even if my sewing machine didn't maul my dress to complete tatters, I could never quite master that professional finish. Thankfully I've stumbled upon some new tools and techniques that make this process SO MUCH easier, and I'm finally making finished produces I'm excited about. I'm so happy to share these tricks with you!

First off, stop everything you're doing and get yourself a straight stitch plate for your sewing machine (I just Googled to find one that fit my sewing machine model). This magical device completely eliminates the sewing-machine-eats-tiny-seams phenomenon!
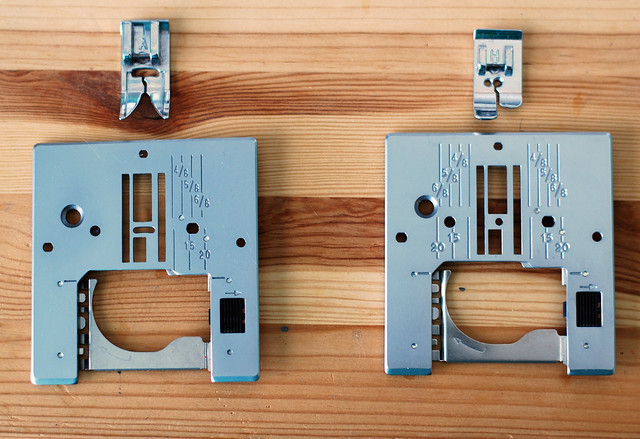
Default needle plate on the left - Straight Stitch needle plate on the right
The difference is the size of the hole available for the needle to go through. On the default plate, the hole for the needle is wide enough to accommodate your widest zig-zag setting. This gap is where your fabric gets sucked down into oblivion. On the straight stitch plate, the hole for the needle is teeny tiny, so no fabric can be pulled down. Just remember you can only do a straight stitch with this needle plate in place!


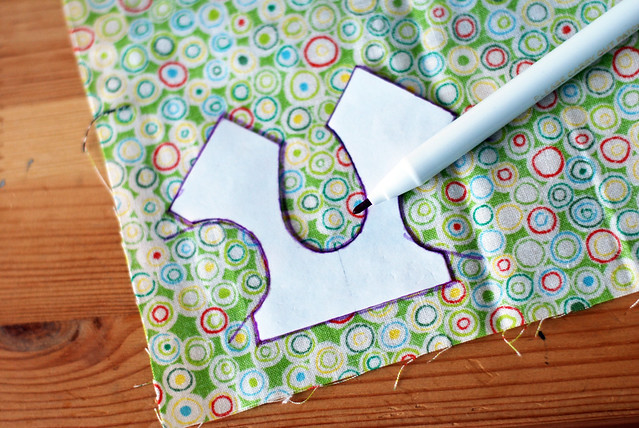
My next tip is to only cut your fabric when you absolutely have to. In the spirit of avoiding those frustrating tiny seam allowances, I've started tracing my bodice pattern directly onto my fabric using a vanishing ink pen. Then I just cut out two squares of fabric and sew along my tracing lines.
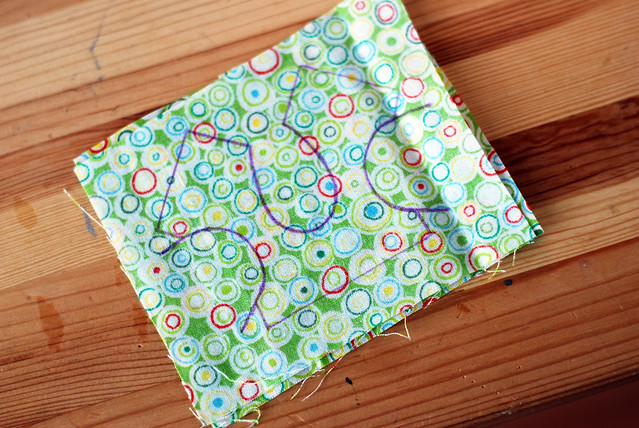

I cannot emphasize enough just how much easier this is! My finished pieces are much more precise since I'm sewing directly on a line, and the fabric is much less likely to unravel while sewing. Just be sure you pay attention to which lines you're supposed to be sewing at each step in your pattern.
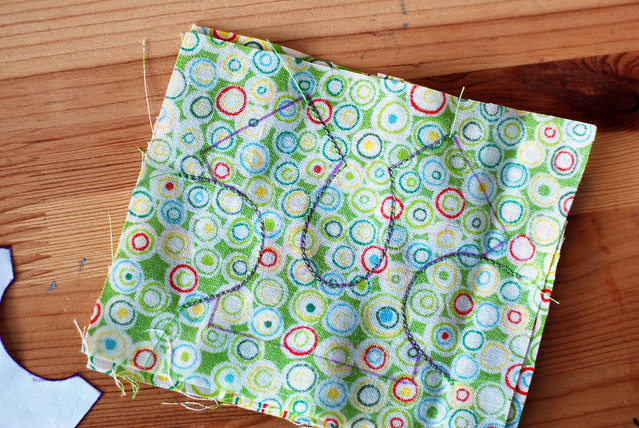
Here I've stitched around the neck and arm openings of the bodice
Once my seams are sewn, I can trim down the finished piece. Just be sure to leave a seam allowance where you need one for future pattern steps (like on the bottom of the bodice to attach the skirt).


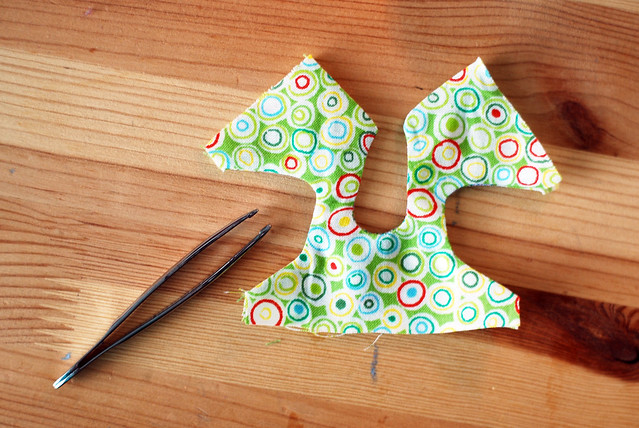
I use these blunt tweezers to turn my tiny pieces right-side-out. The trick with using tweezers is to not pull the fabric. Just use the tweezers to hold the corner still while you turn the rest of the fabric AROUND your stationary tweezers (does that make any sense?). You don't want to be pulling and tugging with the tweezers because you're likely to rip a hole in your fabric.

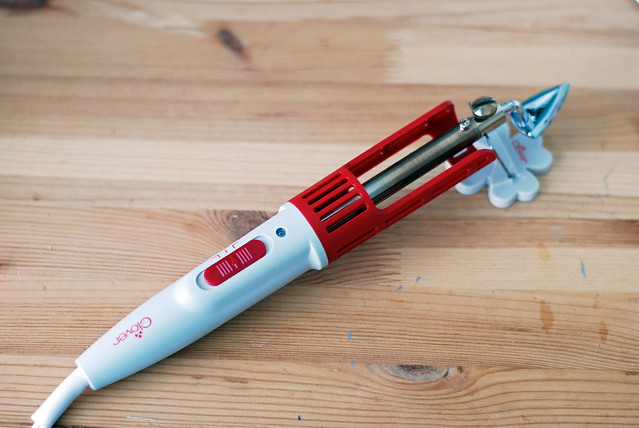
Finally, this mini-iron from Clover is the magical finishing touch to making things look nice and professional.  A full size iron is way too big for these tiny pieces, especially if you're trying to do anything precise at all (and aren't looking to begin a life of crime by burning off your fingerprints!). This tiny iron is perfect for getting all those little corners crisp and square. Just be careful - that post in the middle gets super hot!

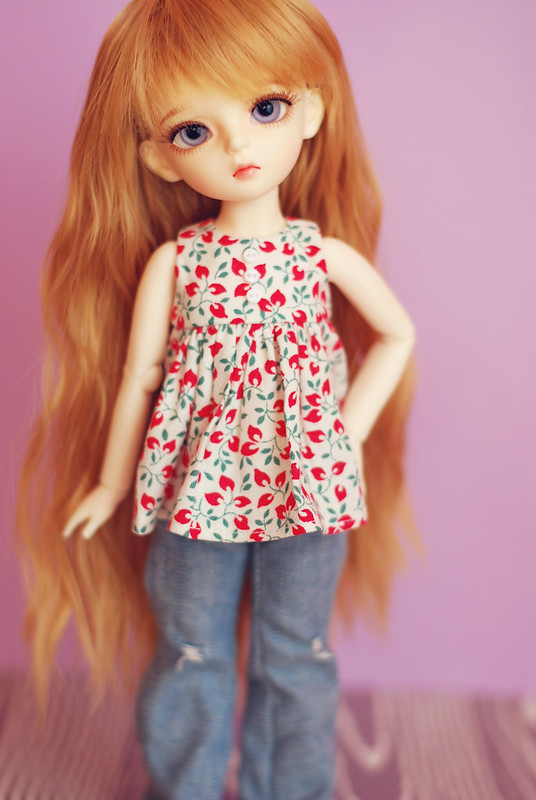
And the finished results!
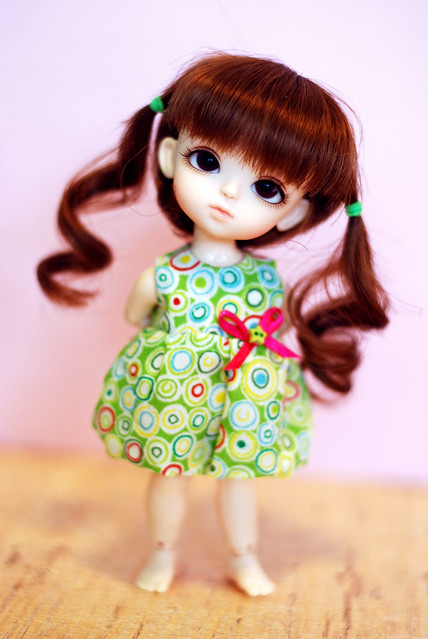

Those are my tricks for sewing tiny doll clothes - get a straight stitch plate, trace your pattern, and get a tiny iron for finishing. They have seriously changed how I view sewing for dolls and made the whole process so much less frustrating and more fun. And isn't fun what it's all about?

Do you have any tips for sewing doll clothes or other tiny things? I'd love to hear them!

Monday, January 12, 2015

My Photography Setup


One of my goals for 2015 is to share my crafting and doll space with you, but that requires me to actually get the space presentable first! After the holidays my craft room is in serious need of some organizational TLC, but I wanted to go ahead and share some of the systems that are working really well for me right now.

I want to begin by showing you the setup I use to take the majority of my doll photos. I love to see "behind the scenes" doll photos and learn how people organize and stage their photos. The system I use has evolved considerably over the years, mostly through trial and error.

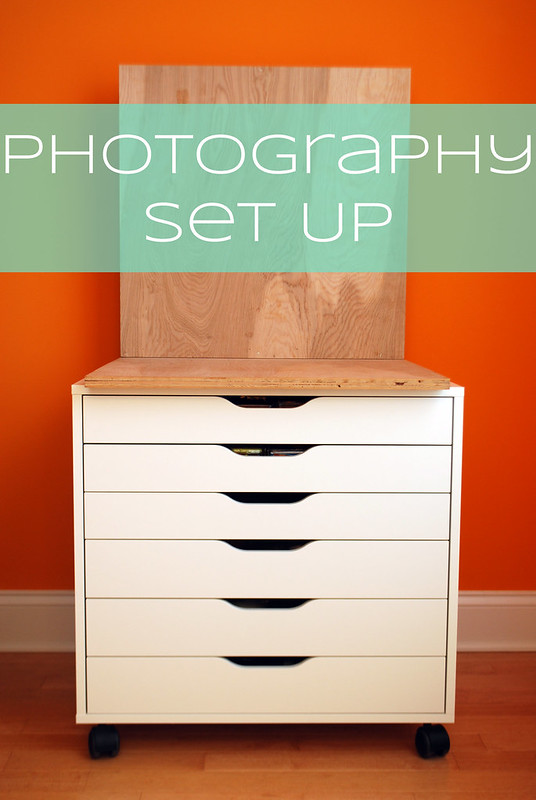
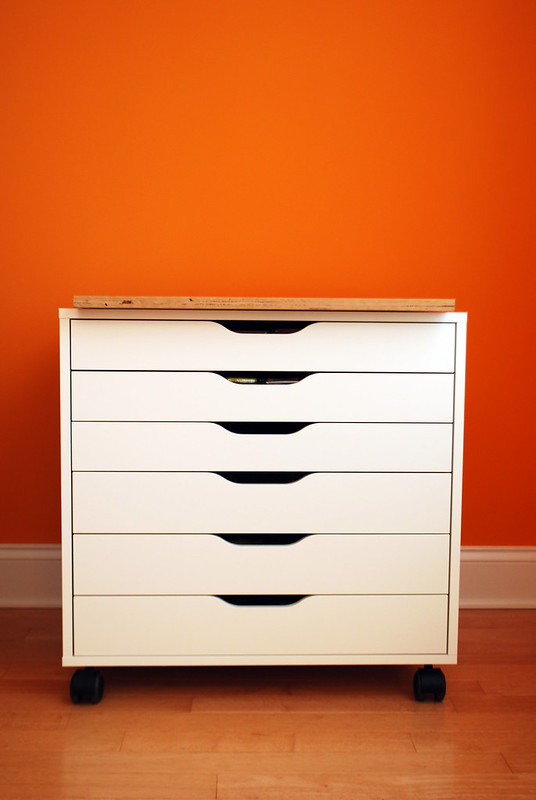
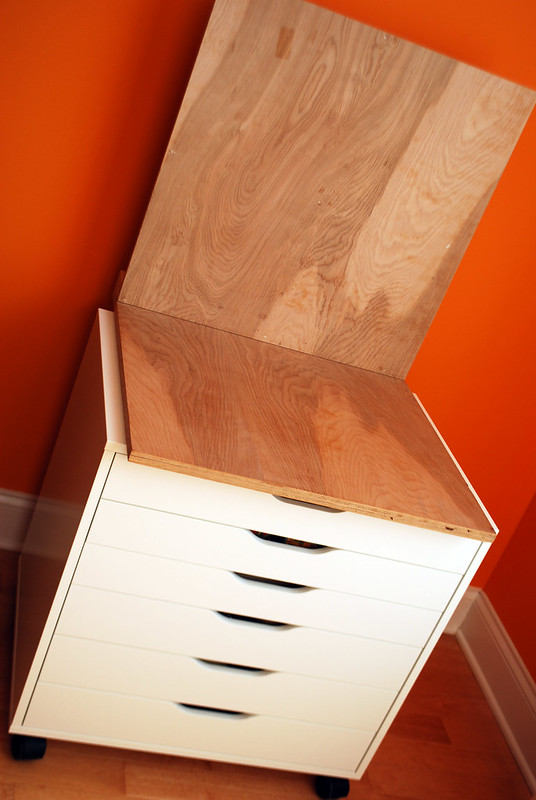
The base of my photo station is the 6 drawer Alex unit from Ikea. I love that I can easily wheel my whole photo station around the house since the very best natural light is in our dining room.


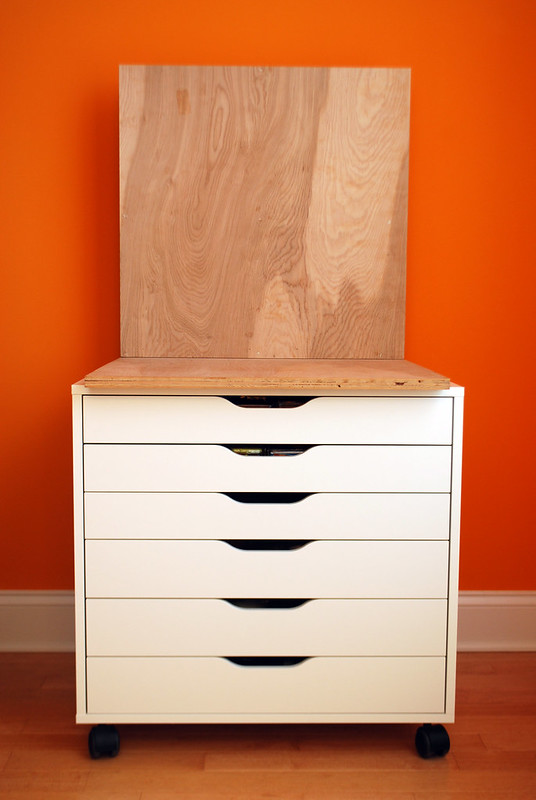
Stored on top of the drawer unit is an L-shaped wooden backdrop that my dad built for me.


I love that this backdrop fits perfectly over the Alex drawers, so it doesn't take up any extra space in the craft room when not in use.


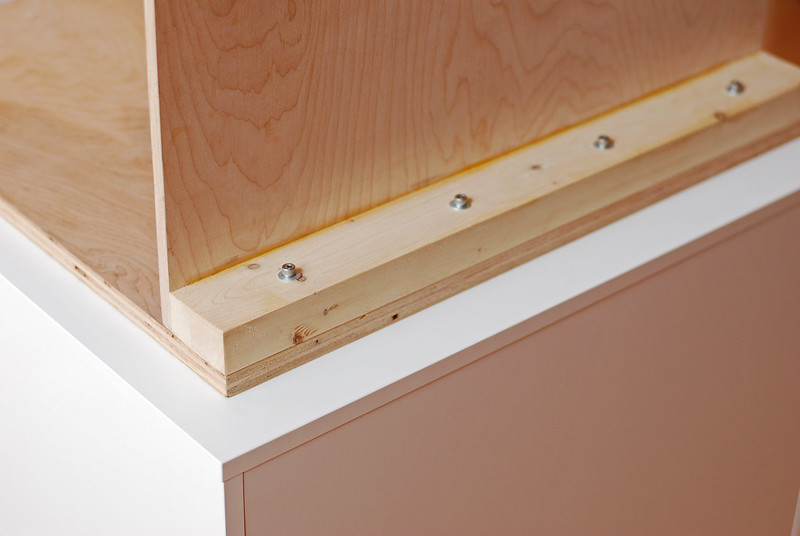
The backdrop is made from two pieces of plywood that are each two feet square. The upright board is attached to a smaller piece of wood which then screws into the base. The types of screws used allow me to easily disassemble the backdrop if needed.


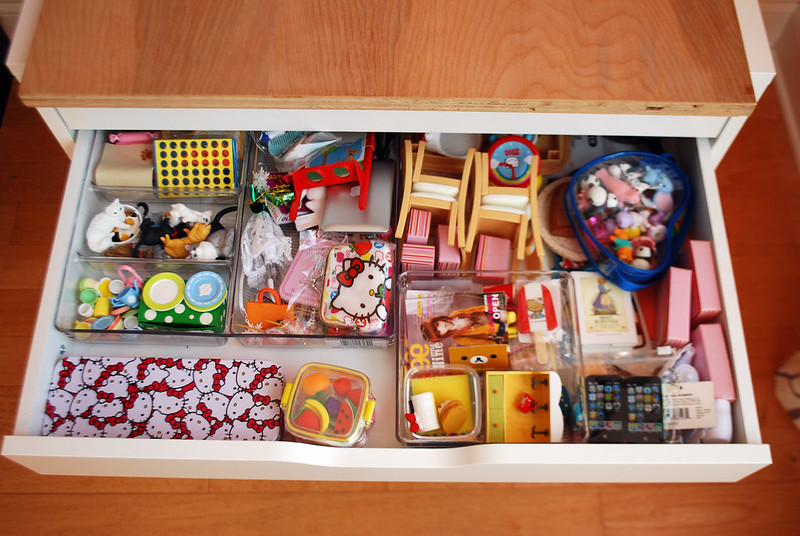
The top three drawers of the Alex unit hold the majority of my photo props. The top drawer holds Re-ment and other miniatures. It looks a little chaotic, but I promise there is a method to the madness! I organize my Re-ment by type rather than series, so categories in my dividers include things like snack food, school supplies, serving pieces, kitchenware, etc. The second drawer holds some overflow Re-ment as well as larger scale props for my MSD and SD sized dolls.


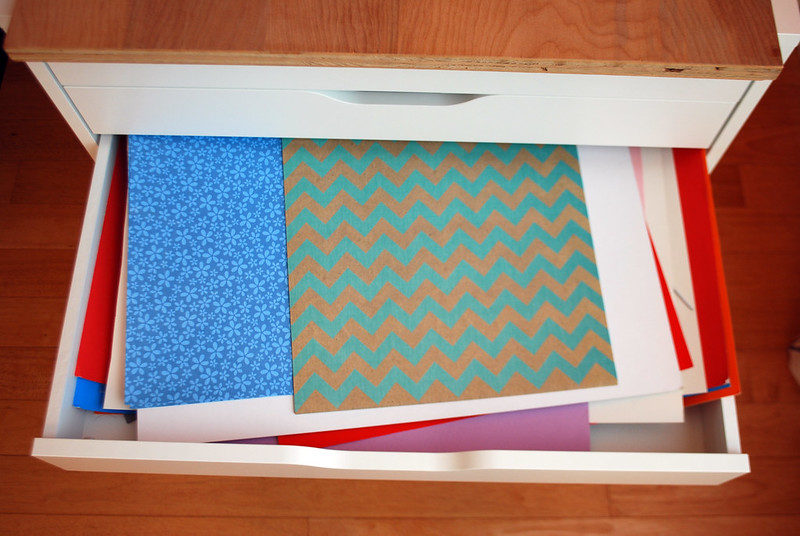
The third drawer holds all my photo backdrops. I primarily use colored posterboard, but I have a fair amount of scrapbook paper as well. I like the poster board because I can get larger pieces, which is helpful for dolls taller than 12 inches.


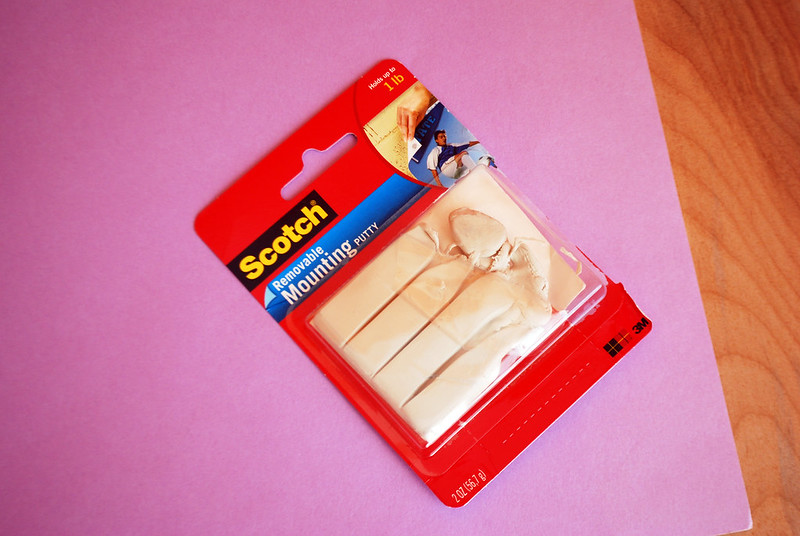
I attach the paper to the wooden backdrop using poster putty.


Here is what it looks like with a doll ready for photos. I'd like to say that I get all professional with a tripod and such, but usually I'm frantically snapping away in an awkward crouch while screeching "Don't touch! No hands!!" at the almost-two-year-old who is typically circling me like a shark at this point, gleefully squealing "BABY!" while brandishing a crayon like a saber at my helpless photo subject. #toddlerproblems


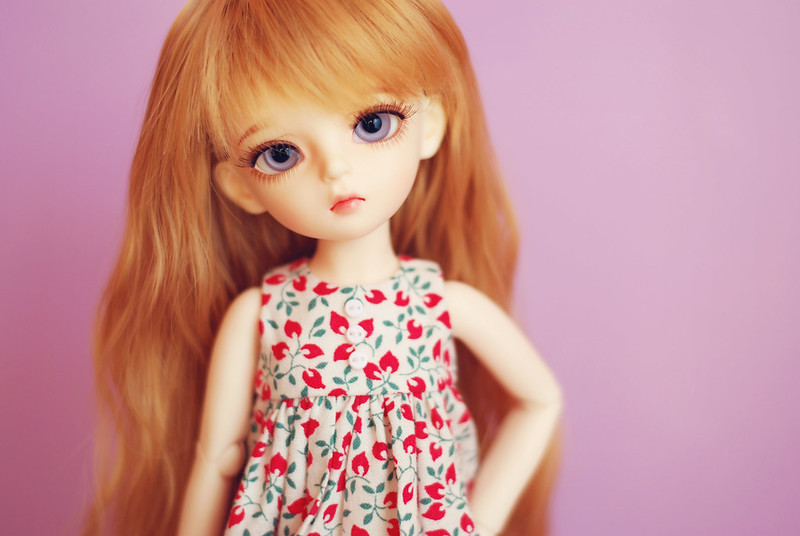
Here are the results of the above photo shoot (and twister-like toddler avoidance dance!). I switched to my 50mm lens for these and did just a little bit of Photoshop processing. Not too much Photoshop for me because I've barely scratched the surface on all there is to learn about that program!


I do also take photos with dolls on the floor, especially for my bigger girls, but that requires someone else home to entertain and contain our resident tornado sweet angel baby!
While it can be a little time consuming to set up and tear down each photo shoot, I really like that everything tucks away out of sight (and out of reach of little hands!) when I'm done. The only real downside of this system is that sometimes my photo angle gets too wide for the backdrop, especially if I'm trying to incorporate lots of props. One of my many project goals for this year is to create some diorama backdrops with more detail on the walls - maybe by using those tri-fold poster boards that are made for science fair projects? I haven't worked out all the details yet.

So that's the behind-the-scenes view of my dolly photography. I'd love to hear about your system or any tips or tricks you might have! Even after years in the hobby I have still never figured out how those amazing photographers get their dolls flying and riding bikes - are they all Photoshop wizards? Tell me if you know!!

Friday, December 19, 2014

Oh Look - Sharpie Mugs!


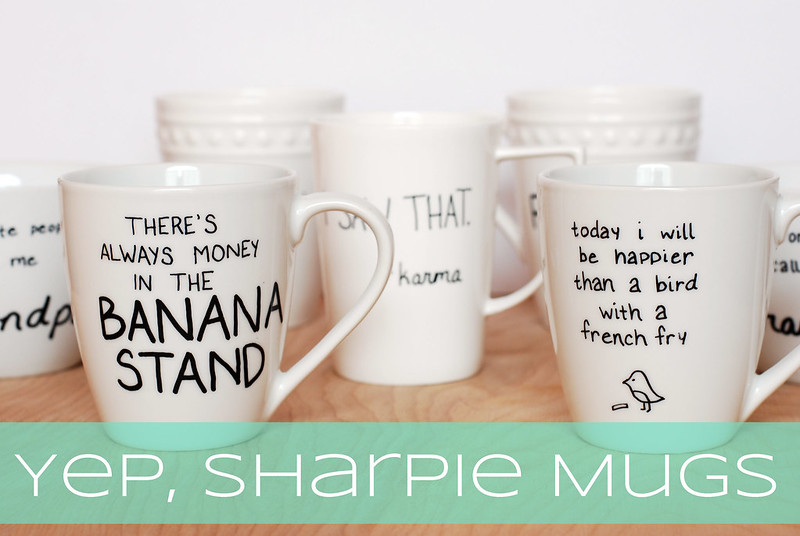
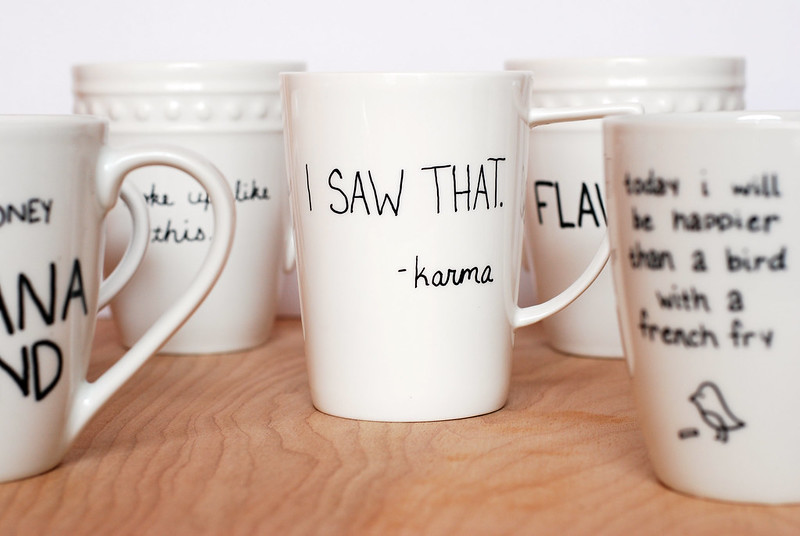
Yep, it's the eleventythousandth variation of sharpie mugs! Each year I always try to give something handmade to the members of my family. In the past I have done this with varying degrees of success (last year I learned too late that glass etching + me = failure!). December has totally kicked my buns this year - I've had some super secret projects in the works that can't be revealed until after the holidays. My lack of holiday time management had me extra excited to knock out these easy and cute projects in an afternoon.


I scored a zillion white mugs in varying shapes from Home Goods. To decorate I used oil based sharpies in extra fine and medium widths. I stuck with simple black because I didn't want the colors mutating in the oven.


I gave each mug a wipe-down with rubbing alcohol prior to writing on them, and I used blue painters tape to keep my writing semi straight. If you make a truly terrible mistake, you can quickly wipe it off with a cotton ball doused in rubbing alcohol, but I found this was only worth it for really awful mistakes because it tended to smear and require you to wipe off a large area.


I let the writing cure overnight prior to baking the mugs. I'm not sure if this had any real effect or not - it was mostly a product of laziness! I started the mugs in a cold oven and then baked them at 425 degrees for 30 minutes (start the timer after the oven has come up to temperature). Starting them in a cold oven helps keep the mugs from cracking, although most of my mugs claimed to be oven safe already.


I plan to pair each mug with a bag of home made hot cocoa mix for gifting. These also made great daycare thank you gifts, and at around $4 a piece I was able to make sure that every single daycare worker got a holiday thank you from our family.

I know sharpie mugs are old news in internet land, but I'm super pleased with how these turned out, especially given how quick they were to make. Definitely my favorite kind of holiday craft - cute, budget friendly, and fast!


Saturday, November 22, 2014

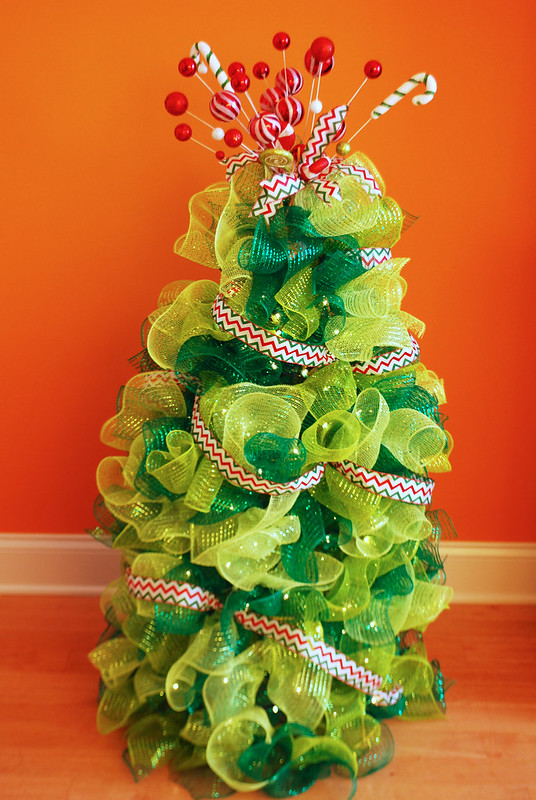
DIY Tomato Cage Christmas Tree


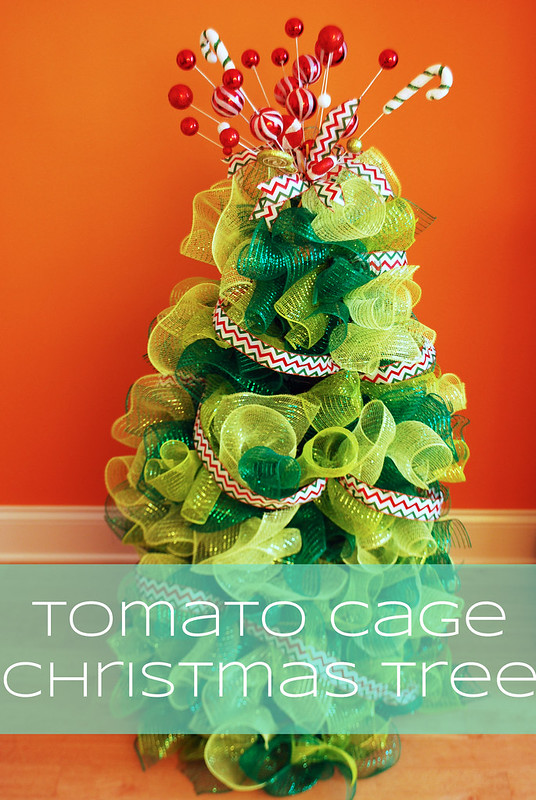
Holy cow! This was a lesson in crafting endurance and bad Pinterest judgement. I had been searching for a front porch tree and was about to bite the bullet and buy one when I stumbled upon these tomato cage trees. I had an old tomato cage on the back deck. I have an unnatural love of deco mesh. Perfect project! Right? Maybe not... There was some bloodshed. There was some swearing. But I am pleased to report that what was once a neon yellow tomato cage has now been transformed into a pretty darn cute little tree. Here's the step by step, so that you can hopefully avoid the flesh wounds!


I began by zip-tying the pointy ends of the tomato cage together, kind of like a teepee. I used two zip-ties looped around each other to help keep the whole thing from sliding up and shooting off the ends of the cage. 


Then I covered my tomato cage teepee in pipe cleaners.


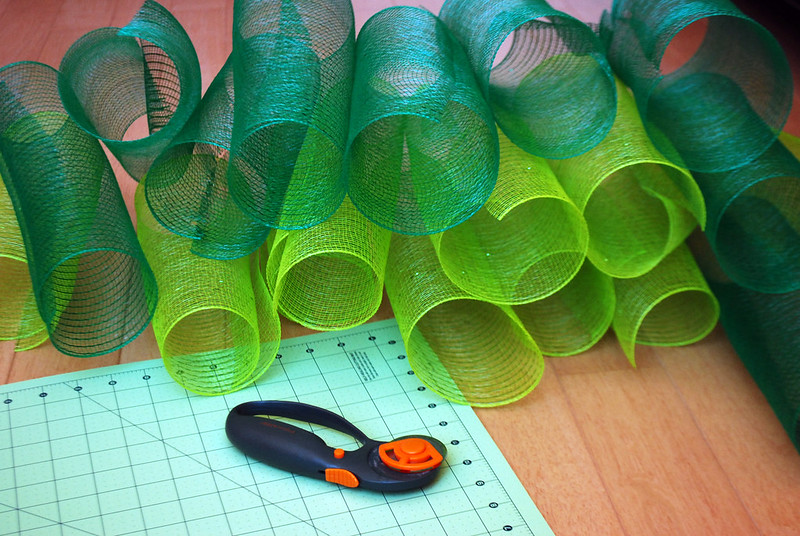
I used my rotary cutter and self-healing mat to cut my deco mesh for the tree filling.


My mesh was 12" wide, so I cut 12" lengths to make squares (which then immediately curled up into tubes).


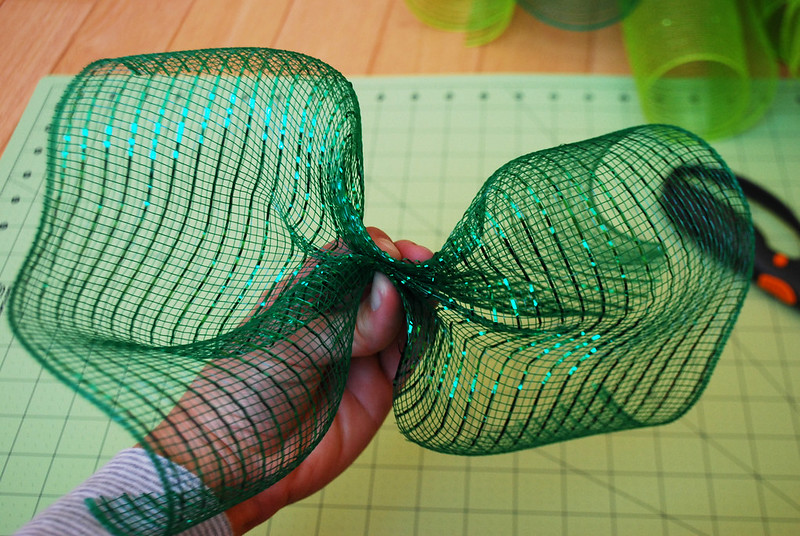
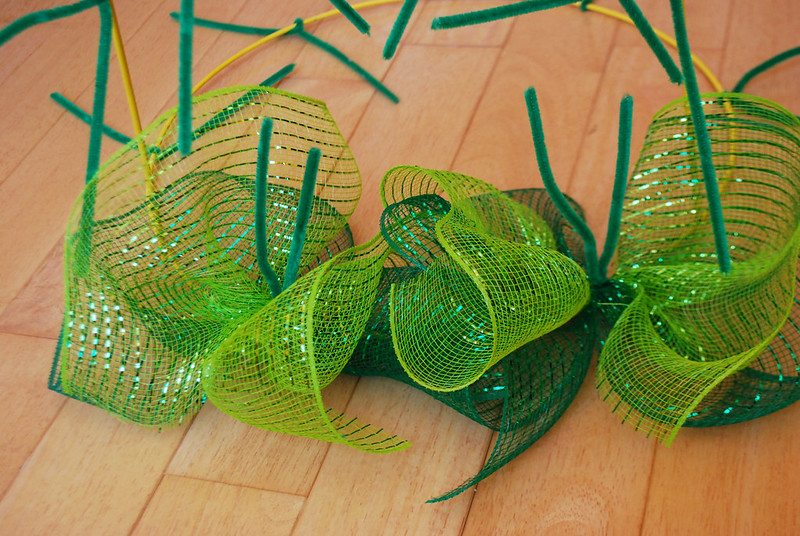
To make the filling tufts, I gathered a square in the middle so that it resembled a giant bow. This works best if you spread the square out so that it's curving away from you. I kept the factory sealed edges to the outside (gather from cut edge to cut edge) to help keep the unraveling to a minimum. I stacked two gathers together and then attach that bundle to the tomato cage.


To attach the tufts, I layered one dark green and one light green gather. Then I twisted the gathered bundle into one of the pipe cleaners. This process would have been much easier with a helper (someone to hold your first gather while you're bunching up the second). As it was, I was definitely sitting in the floor and using my toes - hence, no pictures of this process! It would save time (and finger dexterity) to layer the two colors before gathering, but I found this didn't make the tuft poofy enough to give good coverage on the tomato cage.


Here it is after all 30 pipe cleaners were filled. At this point I was panicking - it was pretty bald looking.


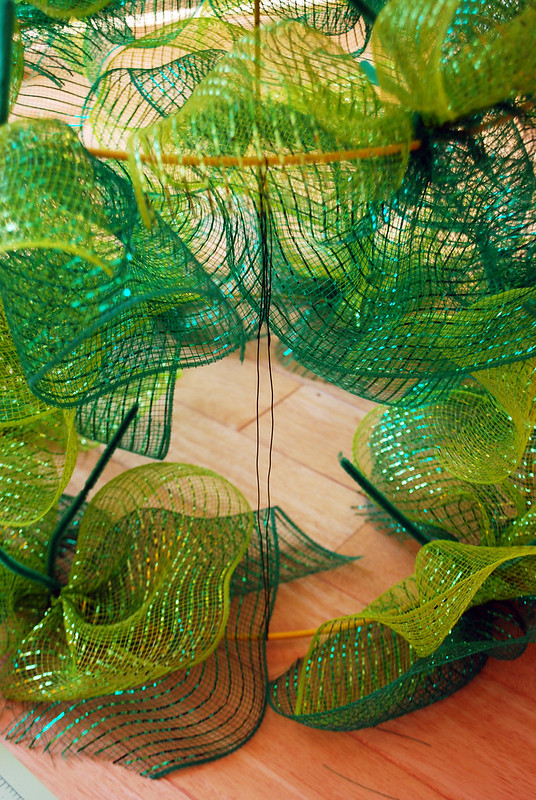
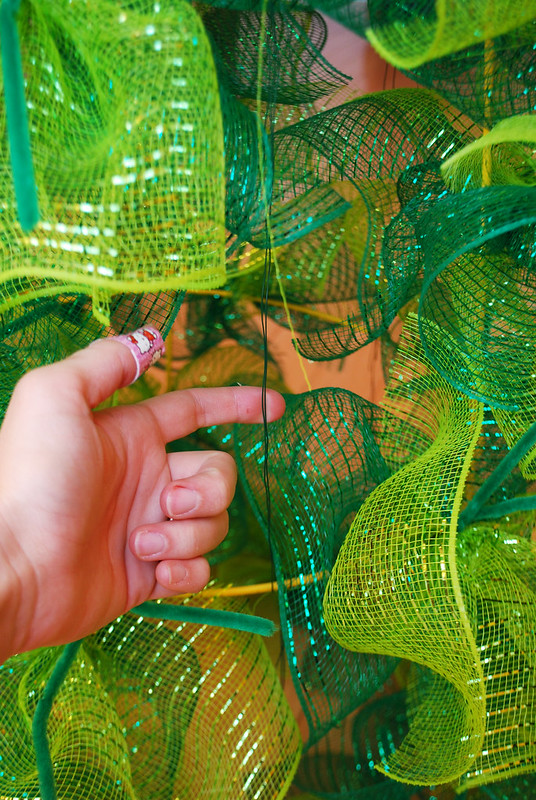
To fill in some of the gaps, I used floral wire to make bridges in between the tomato cage supports. This gave an additional spot to attach tufts. This is also where the bloodshed began! Floral wire is sharp!! Be careful!


I added a total of 6 wire bridges to fill in the bald spots. And some stylish HK band-aids to fill in the holes in my fingers!


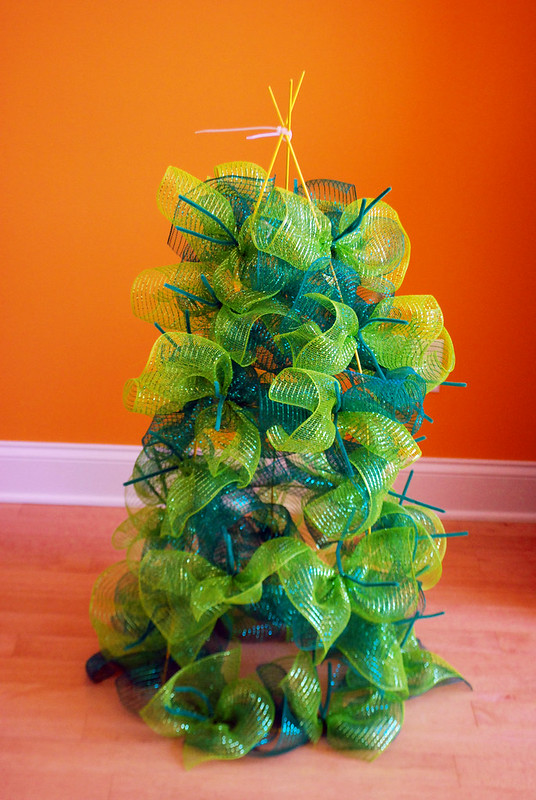
This was after filling in the bald spots. It was looking much more tree-like now (and much more tempting to the cat, who took up residence in the center of the tree immediately following this picture). There was still quite a bit of yellow visible, so I kept adding tufts til I ran out of mesh. I used 4 rolls total (2 of each color).


And decorated! It was actually really challenging to cover up all the tomato cage spikes at the top of the tree. I ended up using two more zip-ties to get the sproingy ball spike thingies (seriously, do those have a name?) to stay up around the top of the tree since there wasn't really anything of substance for them to stick into. Then I made tufts of ribbon to stab down around the tomato cage spikes for extra coverage.

Lights! Can you see them?
I added a string of lights prior to wrapping the ribbon around the tree. The lights and the ribbon really helped it look finished and covered up the rest of the yellow cage. Since I'm planning to use it on the porch I don't think I'll add any extra ornaments.

Things I would do differently if I were to make this again would be: 1) wear gloves to handle floral wire!! and 2) use a dark tomato cage. I think I caused myself a lot more headache than Pinterest implied because my tomato cage was so bright and therefore difficult to cover.

Overall I'm please with how it turned out. It's really cute when you aren't thinking about how much blood I lost making it. I can't say that I would be super thrilled to make another, but I did learn a lot from my mistakes so maybe another would be smoother sailing. What do you think? Have you persevered through some Pinterest almost-fails?

Sunday, October 19, 2014

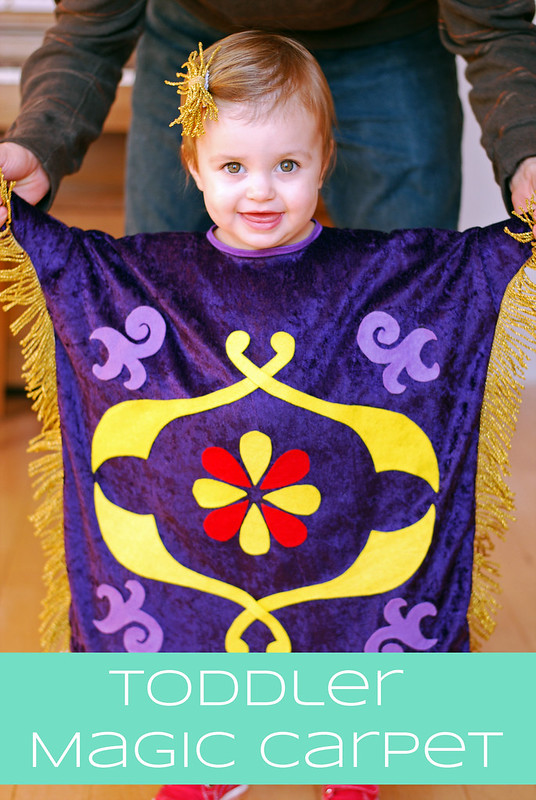
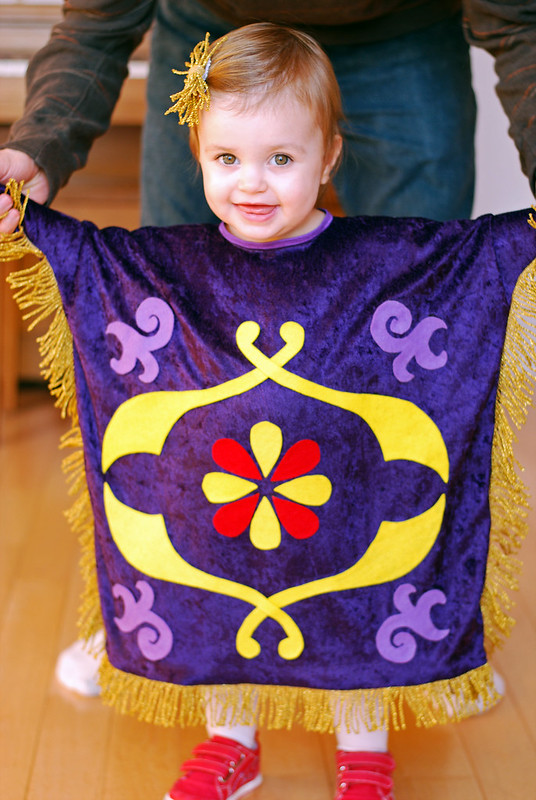
Family Aladdin Costume Part 2 - Toddler Magic Carpet Costume


Check out part one of our Aladdin family costume in my previous post for details on our Genie and Jasmine costumes.

When we decided on an Aladdin Halloween costume theme, I went around and around debating which character we should make Little Plum. In the end we decided on the magic carpet, and I couldn't have been happier with how it turned out! After the initial design process, the costume was actually pretty simple to construct. Here are all the details in case you, too, would like a tiny magic carpet in your life!

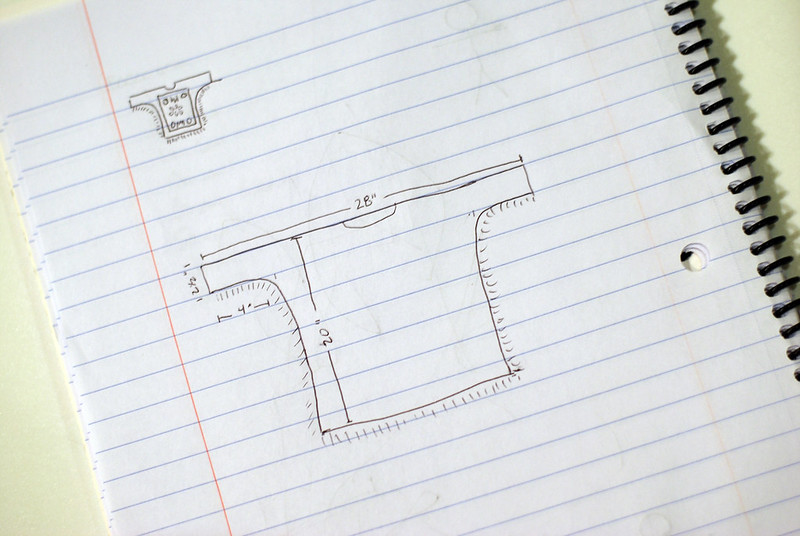
I wanted the costume to have a bit of a flying squirrel quality, but I wanted Little Plum to be able to walk by herself as well. With this in mind, I decided on a dolman type sleeve and left the bottom of the costume open. I measured Little Plum's length from neck to ankle and her arm span to get the general costume dimensions. (In reality I chased her around with a tape measure for 20 minutes, then measured a pair of her pajamas!) Then I added little sleeve-like openings that went from her wrist to her elbow. This is all much easier to see in the design diagram below!


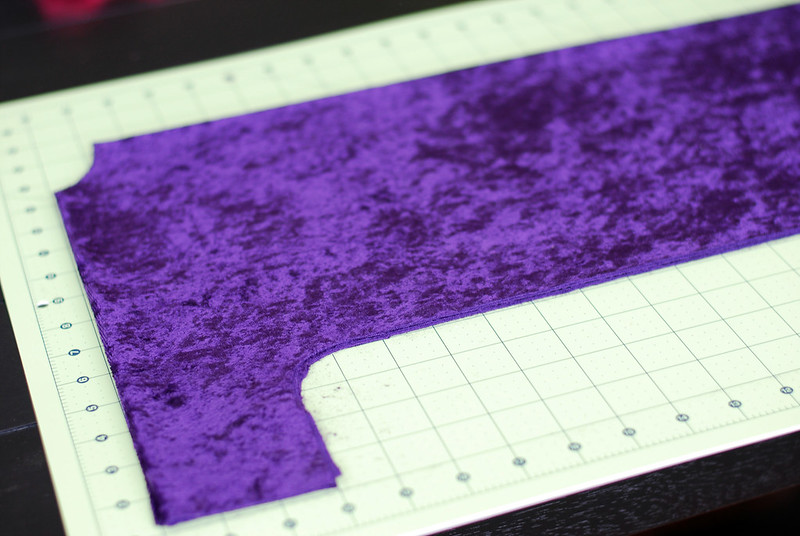
With the general dimensions determined, I cut the fabric using my ruler and rotary cutter rather than drawing out a pattern. I had the fabric folded in quarters when I cut, with a fold along the top edge and a fold down the middle. I just eyeballed the curve from sleeve to body, and since the fabric was folded I knew the two sleeves would match. I also free-handed the neck opening, using her pajama top as a guide. We were left with basically a huge poncho at this point.


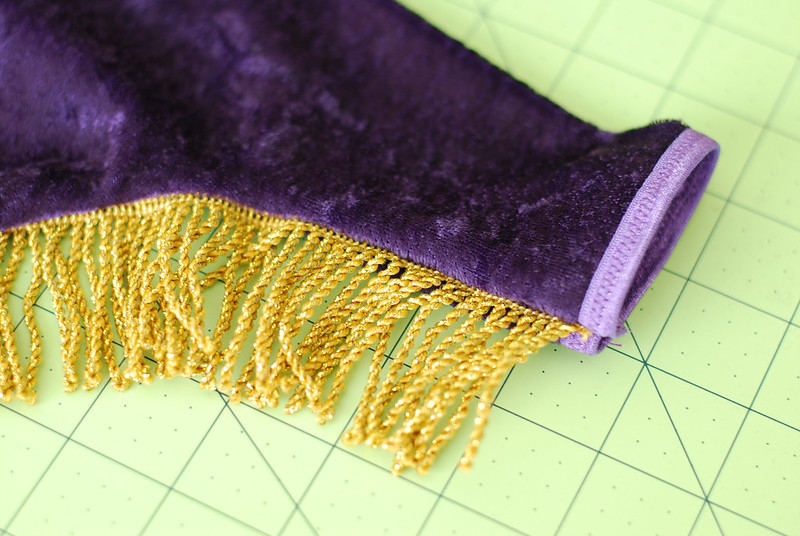
To sew it up, I began by heming the bottom edges using some great gold tassel trim. Then I sewed up the side seams with more tassel trim sandwiched in between. I finished off the wrist and neck openings using fold over elastic with a zig-zag stitch. I'd never used fold over elastic for more than hair ties before, and it was a huge pain to sew, but it really made the difference in having the costume look finished and professional.


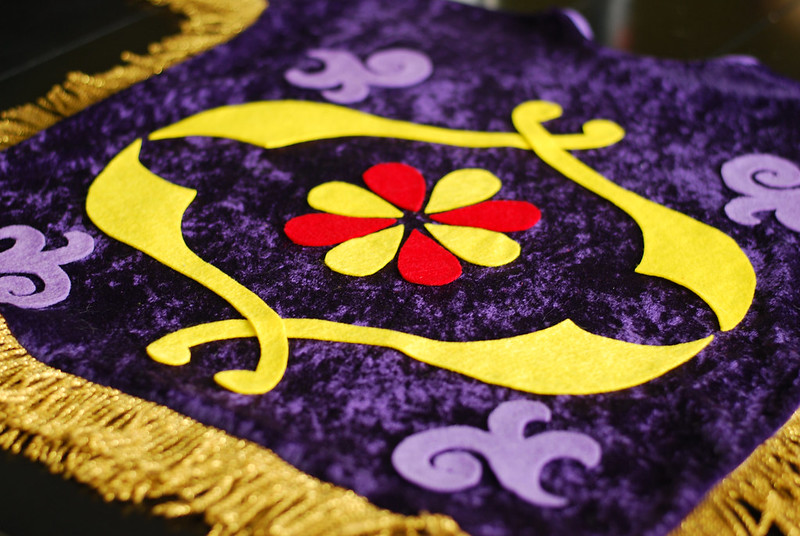
Now it was time to decorate the carpet! I relied heavily on costumes from the Aladdin musical and the few I could find on Pinterest to determine the carpet design. The final design is true to the movie carpet, but only features the center-most portion if the design since I was working on such a small canvas.


I made three patterns for the basic shapes - the tear drops, the swords, and the purple claws. I cut all the shapes out of felt and placed them on the costume starting at armpit level so that the design wouldn't be too distorted with her arms at her sides.


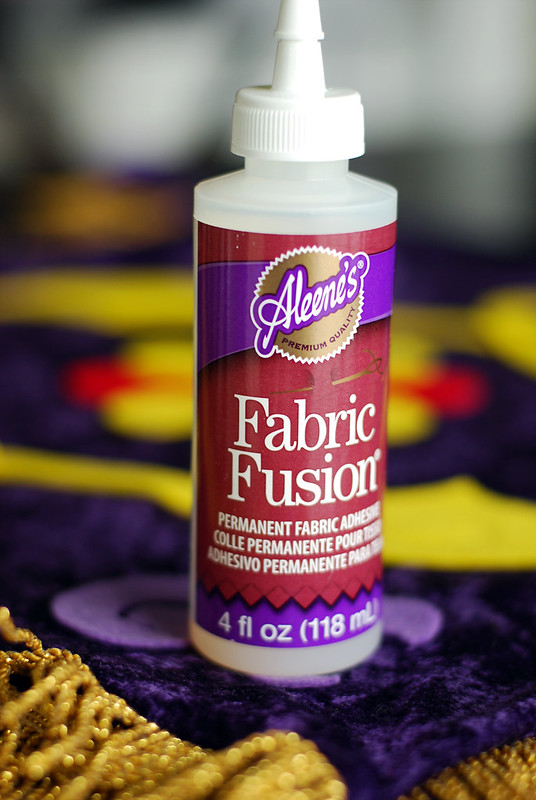
I used fabric glue to attach the felt to the costume. Initially I let the pieces dry about an hour before trying it on and was disappointed that they were easily peeling off. I set it aside for a day and when I came back they were solid as a rock! Lesson learned - let fabric glue cure for 24 hours or so.

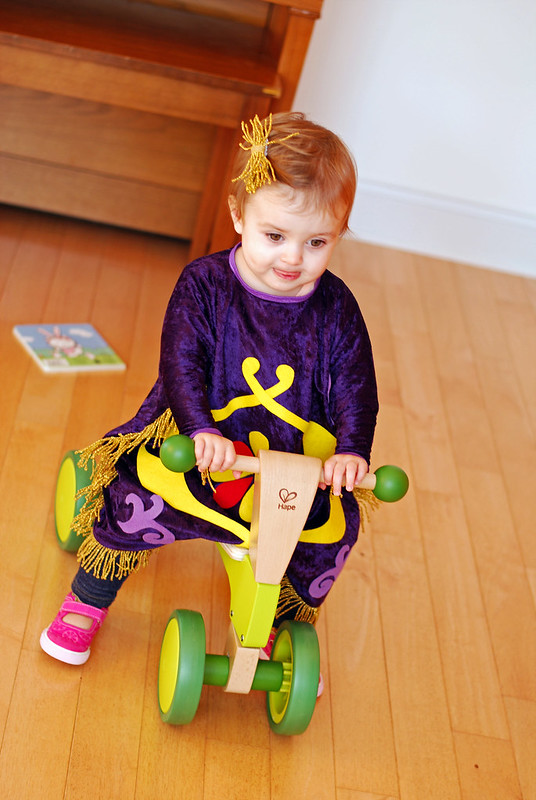
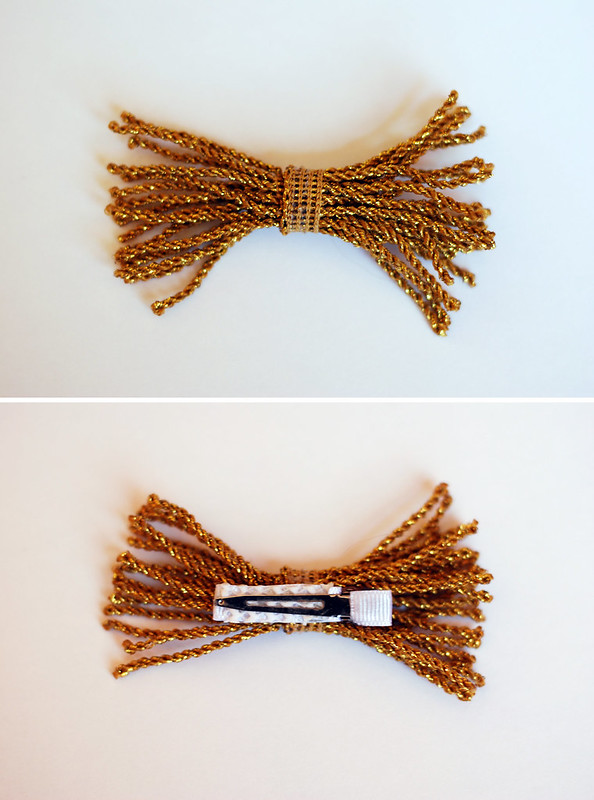
I finished off the costume with a hair bow made out of the gold tassel trim. I just rolled the trim up and hot glued it in place before attaching it to an alligator clip. I added cheap non-slip shelf liner to one side of the alligator clip to keep the bow from slipping.


Pictures totally don't do justice to just how hilarious this costume is in real life! When she moves her arms and the carpet flaps around you can't help but giggle, especially with all those tassels.


The true success of the costume is the she actually loves to wear it! Once the glue fully cured there was no way she could pick the felt pattern off, and it is super easy to put on and take off. But most importantly it doesn't hinder her movement at all, which is of course top priority when you have an oh-so-busy toddler on your hands. It's even tricycle approved!


I hope this tutorial was helpful if you find yourself needing this oddly specific costume! A magic carpet wasn't necessarily the obvious choice when we were thinking about Aladdin characters, but the costume ended up being fairly simple to construct, totally recognizable, and completely hilarious!

I hope you're enjoying the Halloween season and having fun dressing up!

Thursday, October 16, 2014

Family Aladdin Costume


It's Halloween costume time!

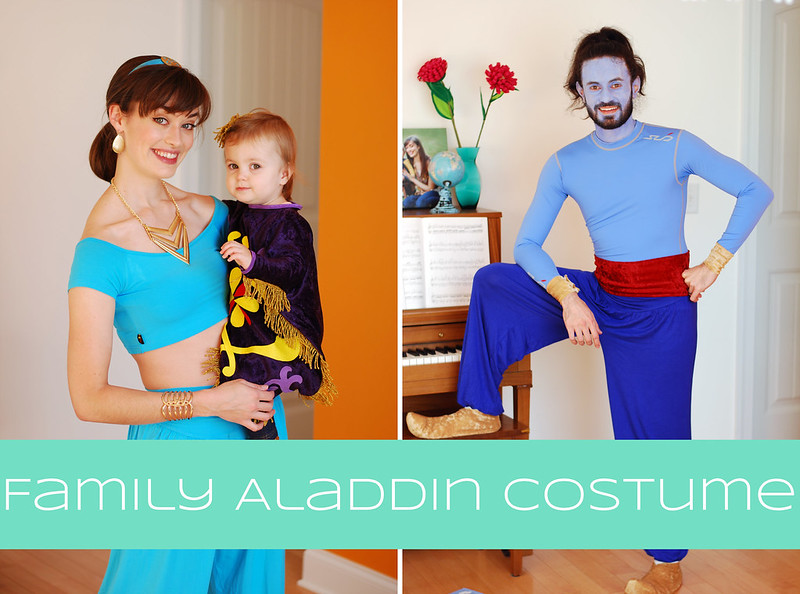
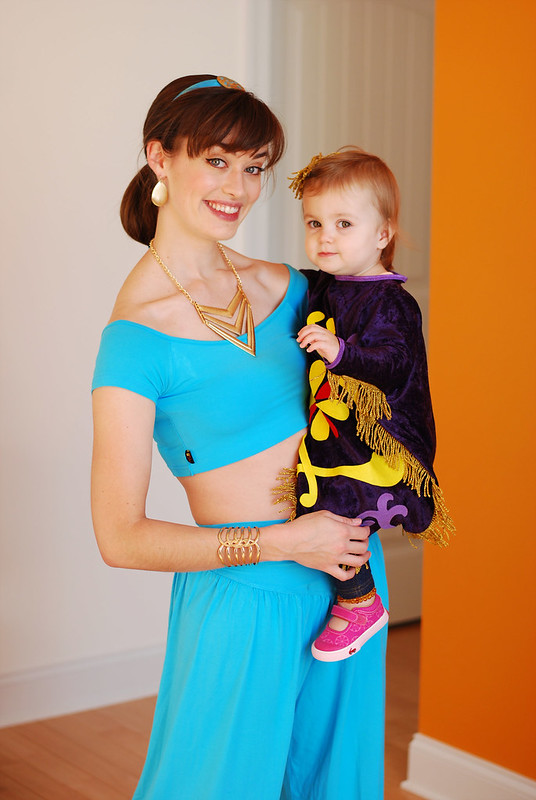
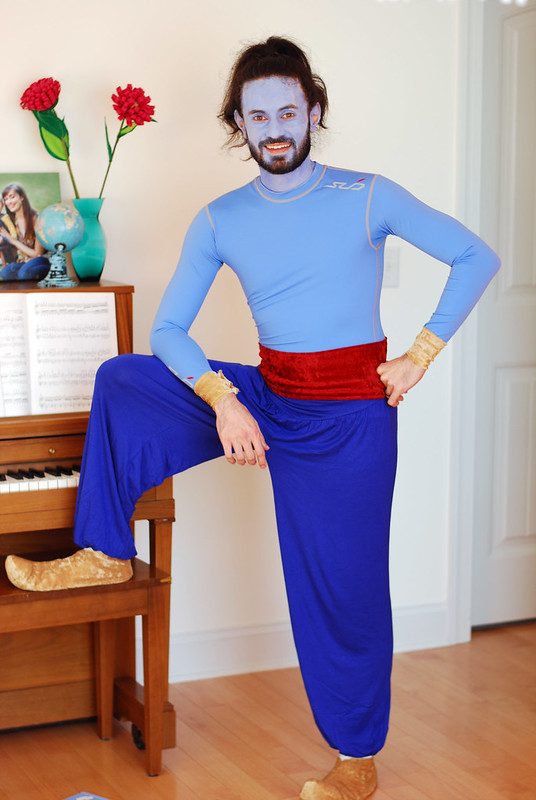
This costume needs just a little bit of explaining. We go to a themed party every year, and this year's theme was Robin Williams. While there's no shortage of costumes to fit such a theme, we were looking for a family friendly option. So we decided to paint Mr. Plum blue! Ok, ok, that wasn't the only reason we picked Aladdin, but it was definitely a bonus! Mr. Plum was obviously the Genie to include Robin Williams' roll in the film, I went as Jasmine, and Little Plum was the magic carpet. I'll give you the break down on the adult costumes in this post. The fabulous toddler magic carpet costume deserves a post all it's own!

The basics of our adult costumes were dance costumes (our harem pants and my top). We purchased ours from Amazon, but you can find them much cheaper on eBay if you order well in advance to account for international shipping. A note about sizing - Mr. Plum and I are both wearing extra larges! The sizes are Asian and teeny tiny! I had to completely remove the elastic from the waistband of my pants to make them lay right. The fabric is stretchy enough that I didn't replace the elastic with anything, I just left it out all together.


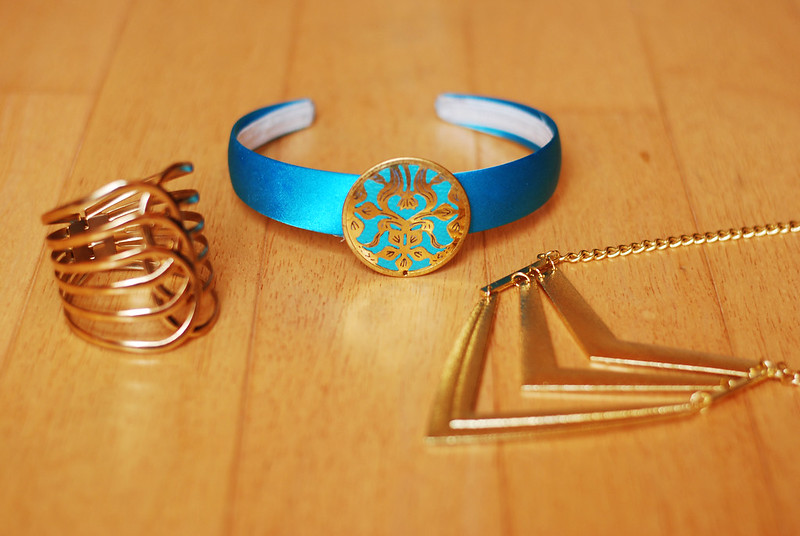
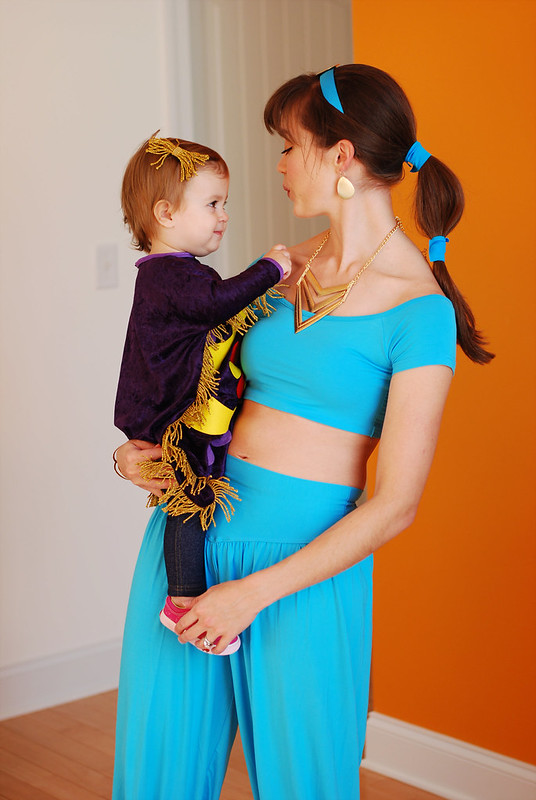
My costume was simple enough to finish off with some gold jewelry and gold ballet flats. My headband and it's embellishment are from Joann's.


My ponytail holders were covered with strips of blue fabric secured with Velcro dots. And that's it! Easy peasy.

Mr. Plum's costume had a few more DIY details to really make it true to the movie. His top is a light blue athletic compression top (also purchased from Amazon) so that we didn't have to paint his entire body!

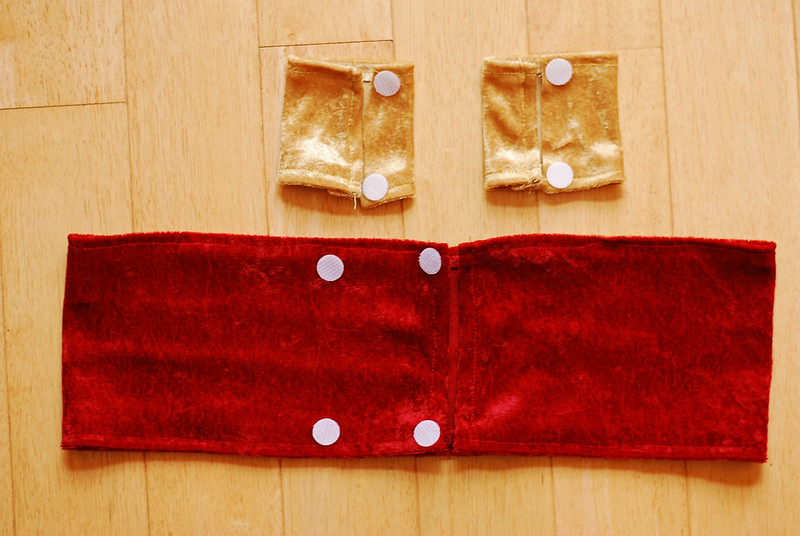
We finished off the costume with a simple red sash sewn from red stretchy velour fabric and gold wrist cuffs sewn from a similar fabric. Both secured with Velcro dots.


The genie shoes were a bit of a last minute complication. We set out to buy some jester shoes the day of the party, but it turns out those aren't exactly a hot costume item this year and nowhere carried them. Rather than break character, Mr. Plum promptly took me to the fabric store and demanded requested that I sew him some genie shoes. Here are the steps I followed in case you need to make your own last minute genie shoes!

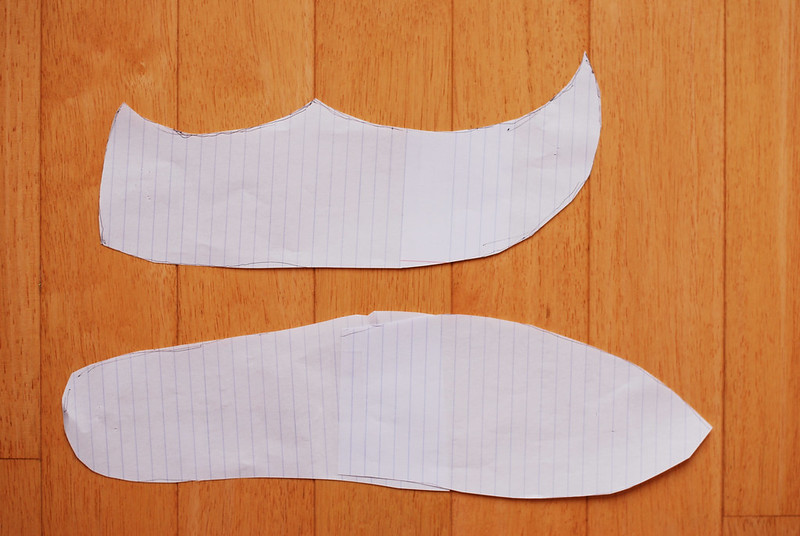
Start by tracing the sole of a low profile shoe (I used Mr. Plum's running shoes) and add a point off the toe approximately the length of the curl you'd like on the shoe.


Next trace the side of the shoe, adding the curled toe using the length of the sole pattern as a guide for the length of the curl.


Cut two soles and four sides from stretchy fabric. I used the same gold velour used for the genie wrist cuffs. I added approximately 1/4 inch seam allowance to the side pieces. I didn't add any seam allowance to the sole pieces (the thickness of tracing around the tennis shoe made up for it).

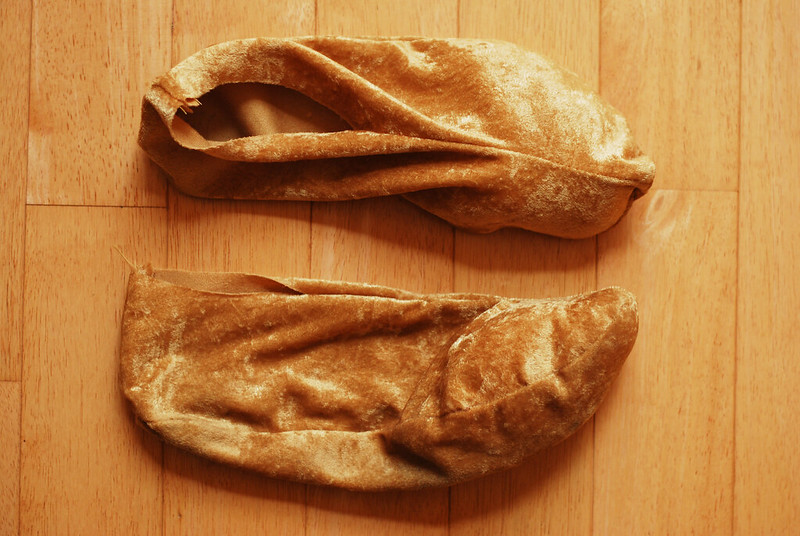
Begin assembly by sewing the two side pieces together at the heels and along the curved top, right sides together.

Now that you have the two sides attached, sew the sole onto the sides with right sides together. You may have to fudge a bit with this step (especially if you made your pattern in, say, the last 15 minutes before you needed to leave the house!). I made sure to line up the toe seams and left any fudging to be done on the heels since that wouldn't be seen as much. Also be prepared to use about a thousand straight pins to hold all those curves together. Once the sole is sewn on, turn everything right side out and you should have a shoe.


I added a little stuffing to help the toes keep their shape. If I'd had more time I might have finished the ankle opening, but since this was eleventh-hour-speed-sewing I just left that portion unfinished.

That's it for our Jasmine and Genie costumes. In the end our DIY versions weren't much cheaper than pre-made costumes, but the pieces are much more versatile and I know we will use them again (harem pants are comfy, yo!). I'll share all the details of Little Plum's magic carpet costume in my next post.